
I was idly noodling on Amazon for camera harnesses, when it struck me that I might be able to make my own. You see, despite having downsized my wildlife lens, weight-wise, swapping my Tamron 150-600 for a Nikon 300mm f/4 plus teleconverters, I’m still finding it quite back breaking to carry it for any length of time. I use the over the shoulder and across the body technique, rather than round the neck, which reduces the strain a little, but even so, it’s still not comfortable after a few miles of RSPB Ham Wall.
However, all the good harnesses are rather expensive, although not as expensive as the other option, swapping my D500 for an OM1, which is the ideal, given a decent lottery win. They also still put all the weight on the shoulders – I needed one that also attached to a belt, to take some of the load. But then, after a lot of noodling, I had the brainwave.
Essentially those commercial harnesses are all mostly a bunch of straps sewn together, and I have a load of unused straps from the numerous bags and cameras bought over the years. So I had a rummage, and came up with this lot…
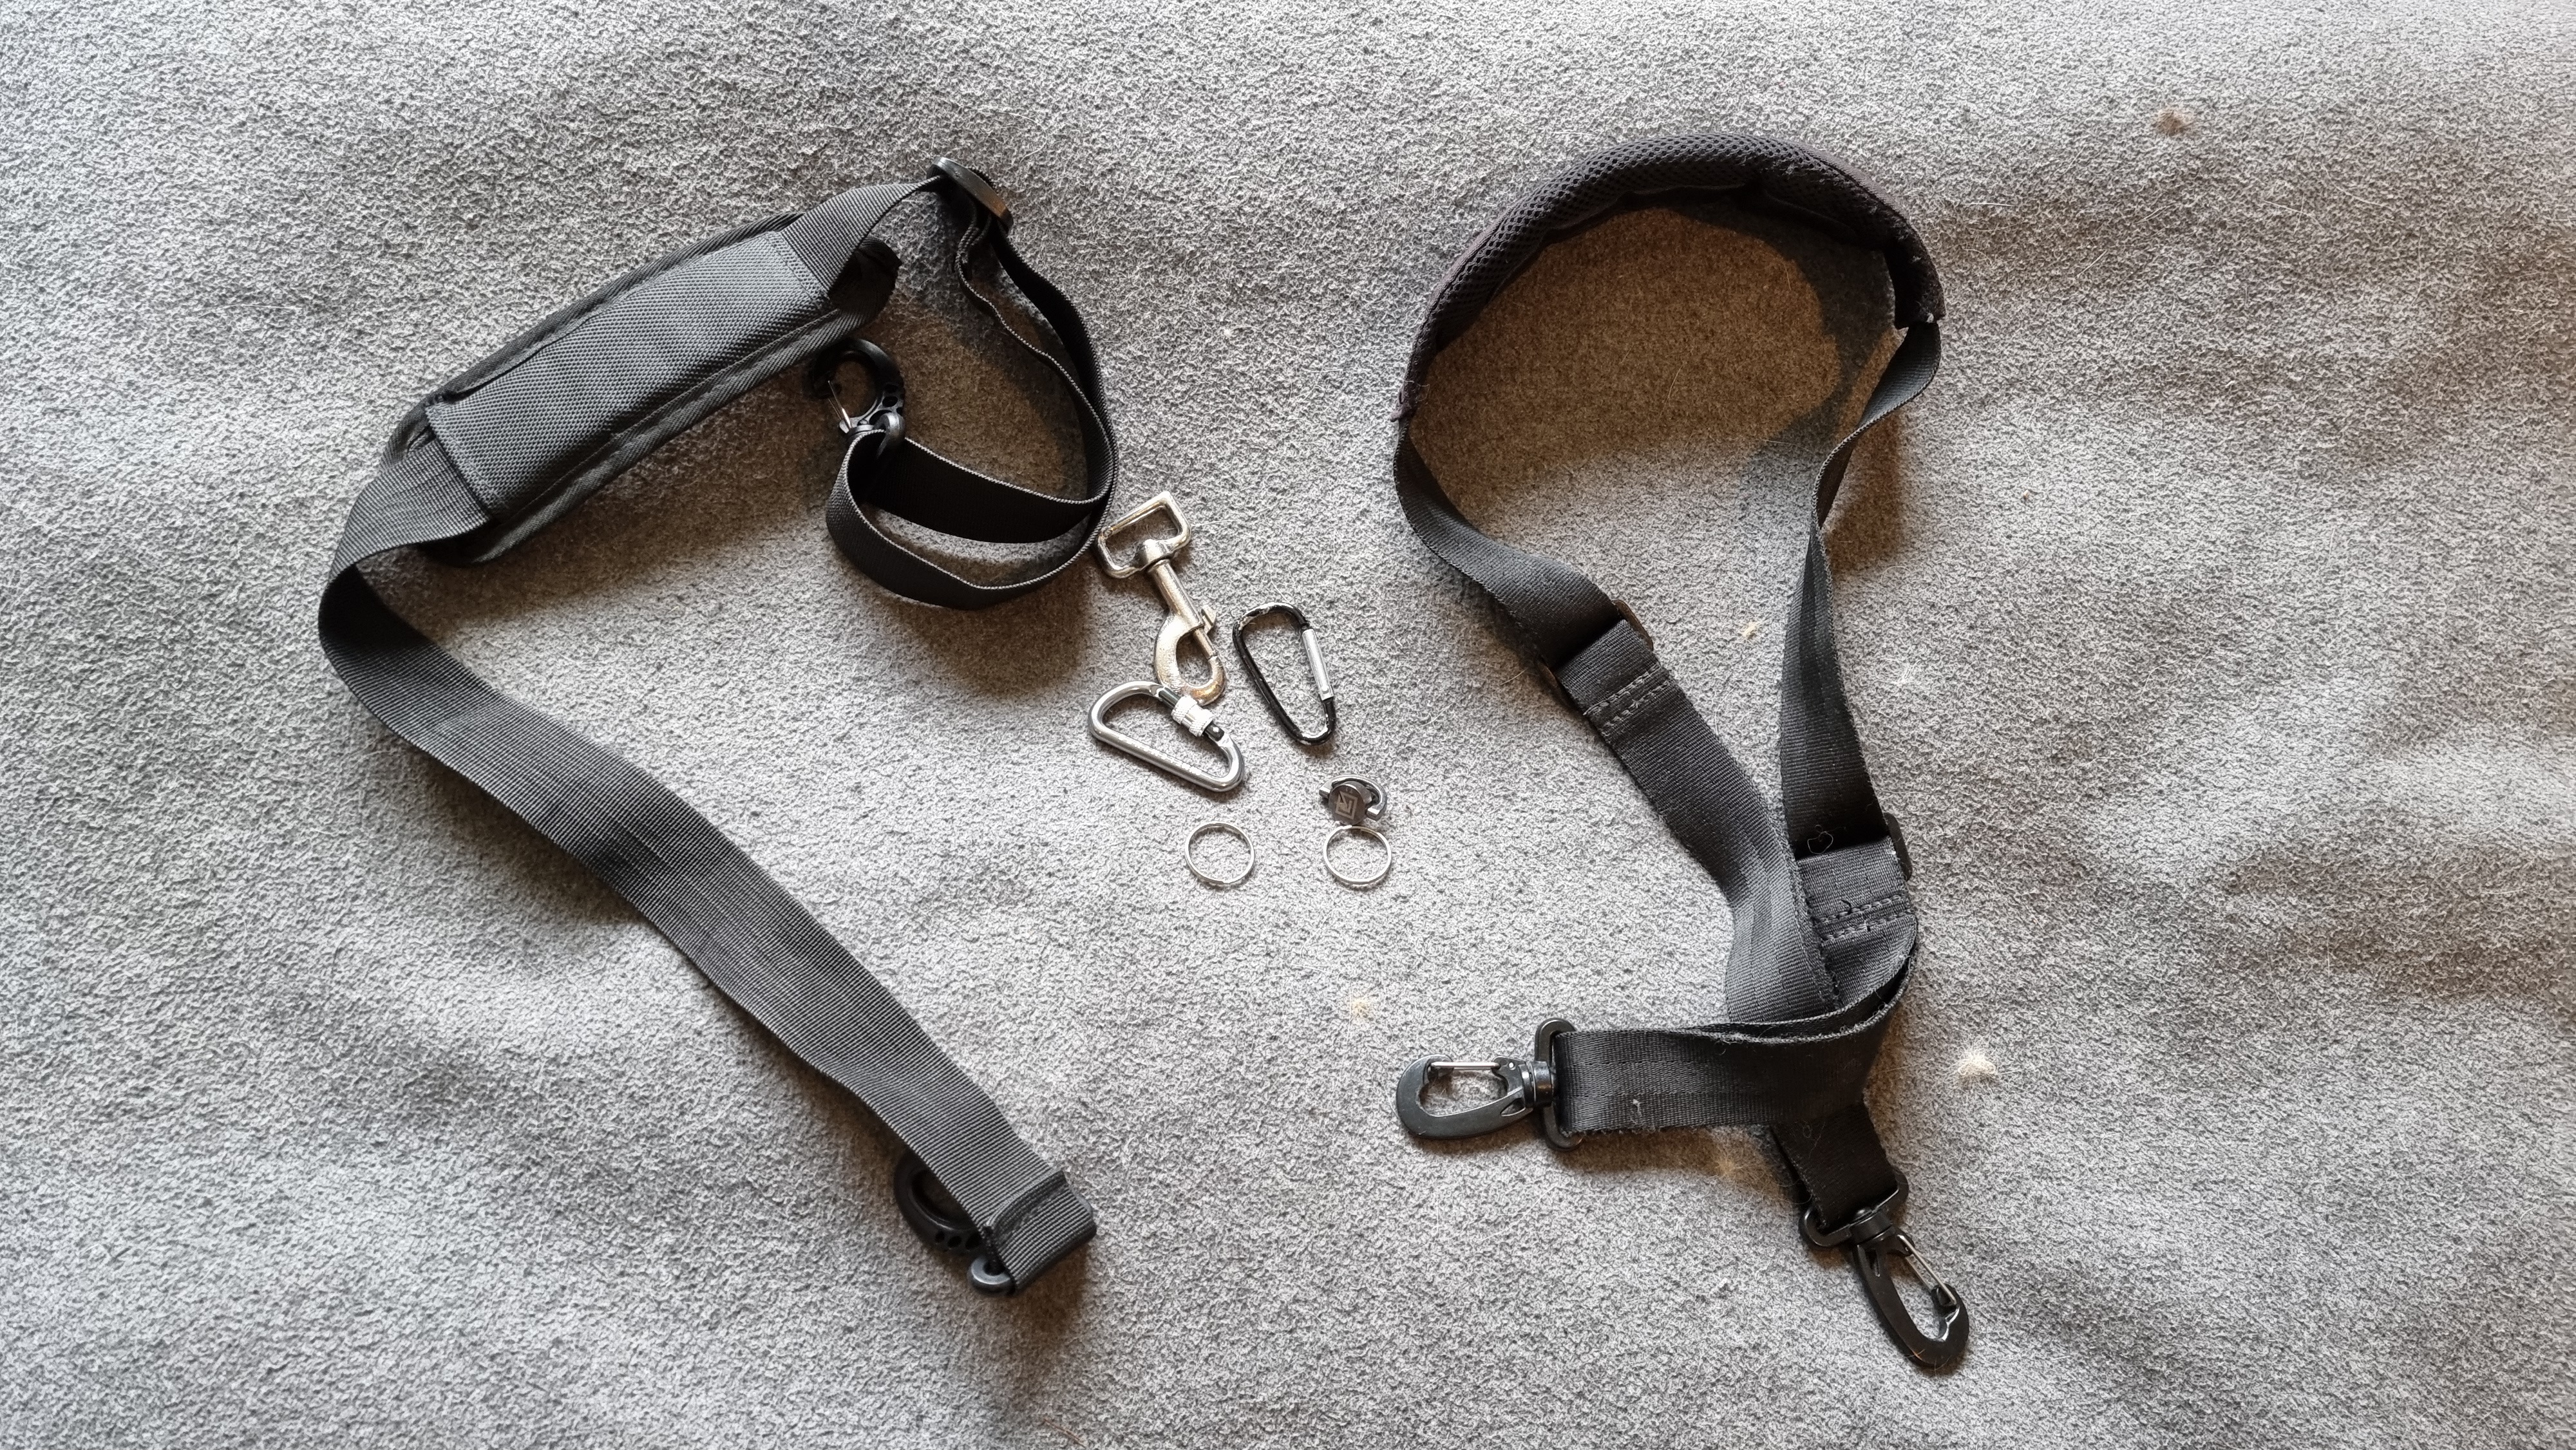
As you can see, two luggage straps (comfier and more padded than most camera straps), two carabiners, the buckle from an old dog lead, a couple of O rings (which I didn’t need in the end) and a BlackRapid FastenR, all of which I already had.
So, one end of each strap attaches to the dog lead buckle, which clips onto the FastenR screwed into the camera’s tripod foot, while the other ends attach to one of the carabiners, which in turn attaches to the second carabiner, which goes on the back of my belt.
And there you have it – one DIY camera harness, with no sewing and no expenditure!
I really shouldn’t be left home alone.
Of course, time will tell whether it does alleviate some of the strain – watch this space…
